Setting Up Delivery and Shipping in GrownBy
GrownBy has features to help make Delivery and Shipping of your products and shares go as smoothly as possible. Delivery is linked to geographic Delivery Zones, which you define through zip codes. Shipping is similarly linked to Shipping Zones, which you define by State. Once you set up Delivery/Shipping Zone(s), they will only be available to Customers whose address falls within the defined zone.
Note: Your customers’ addresses are saved and can be viewed and edited by the Farm Admin or the Customer in their account.
Adding a Shipping or Delivery Zone
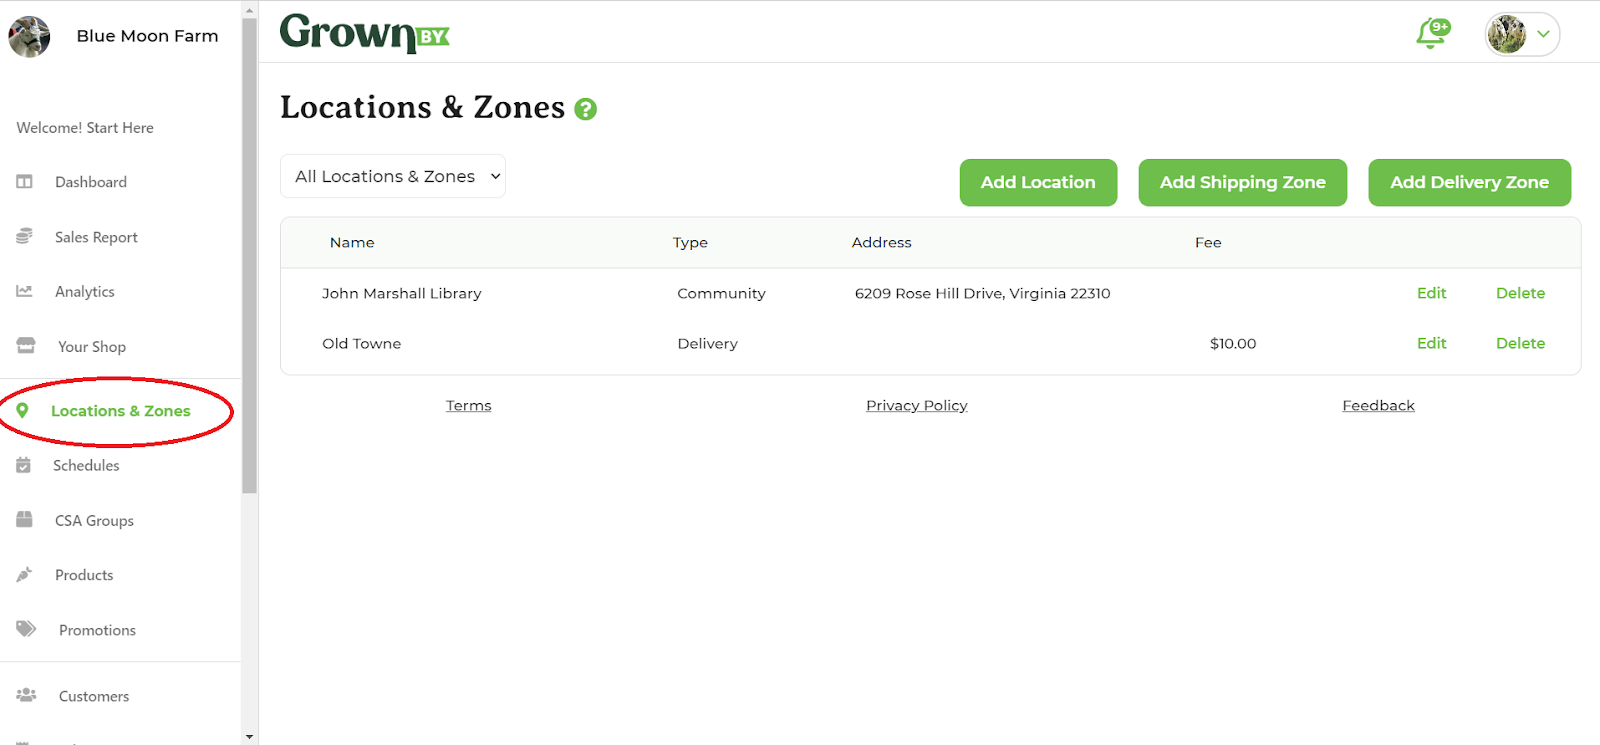
The first step is to define a Zone. To begin, click on Locations & Zones in the Menu on your Dashboard.
Next, choose Add Delivery Zone or Add Shipping Zone which will bring you to a page like this:
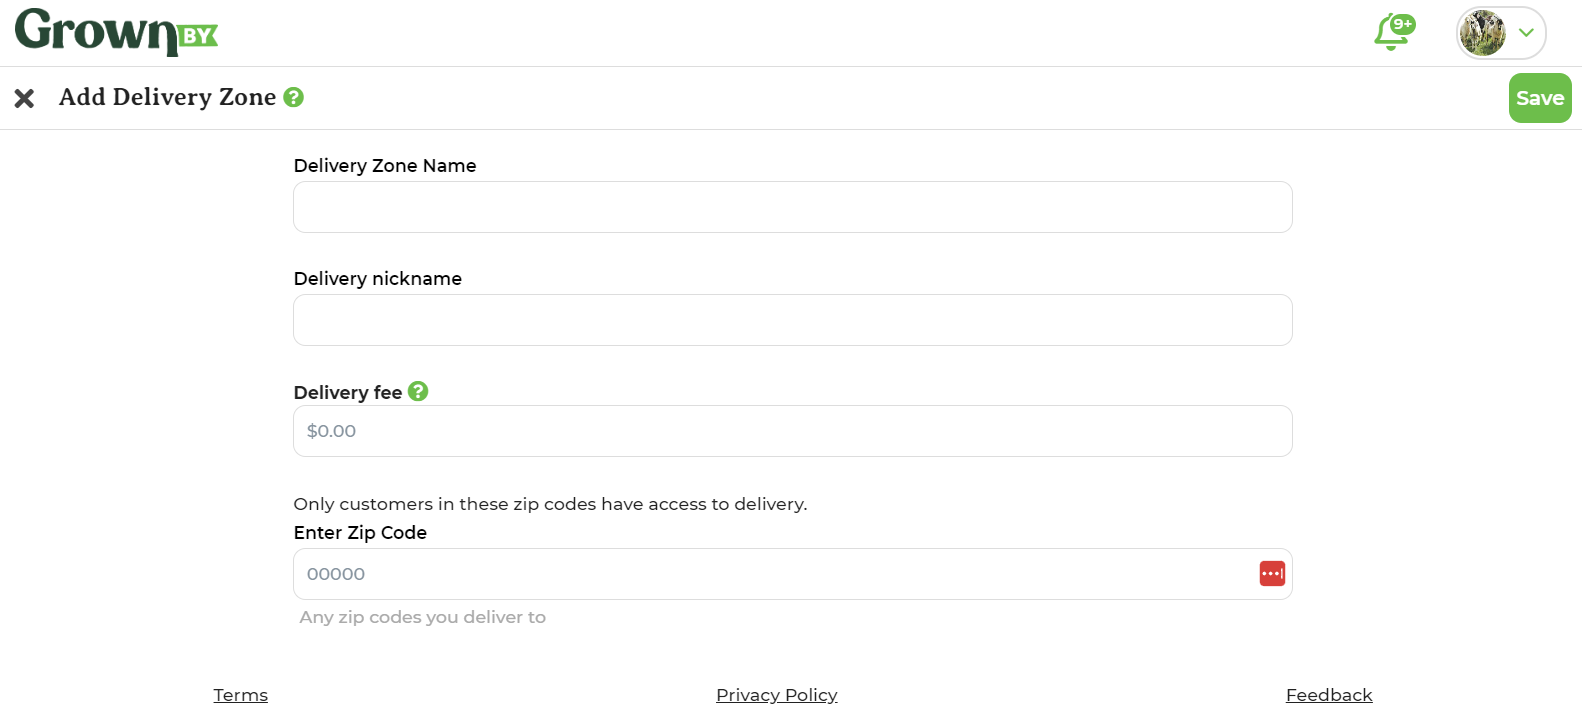
To create a zone, first enter a Shipping/Delivery Zone Name and Delivery nickname. Next, enter a Shipping/Delivery fee. You must charge a fee if you are offering delivery (but it can be set to $0). Shipping fees are optional. Finally, add all states or zip codes that make up the Shipping or Delivery Zone. Customers will only be able to place an order if their address matches the parameters you specify for the Zone. For delivery, to help you determine which zipcodes to include, try this tool. As you enter each zip code or state, it will populate below the entry field. To remove one, click the X next to it. When you’re done, click Save at the top right. You will be redirected back to the Locations & Zones page.
What your Customers Will See
In your Shop, when a customer clicks on a product that has an available Delivery or Shipping schedule attached to it, they will see that option. In this example, the product has all three types, pick-up, delivery, and shipping:
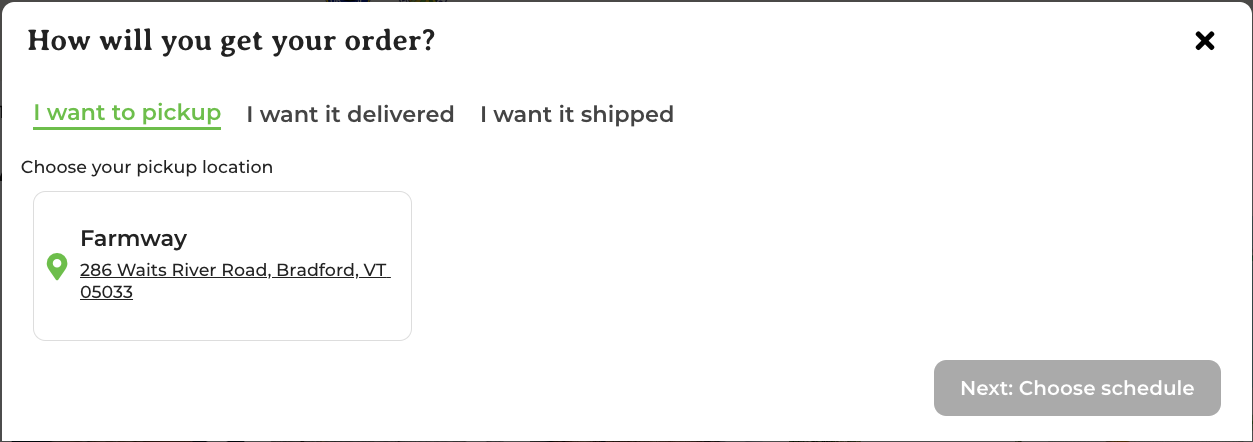
If the customer is signed in and their address matches the delivery or shipping zone, they will see a message that confirms that they can receive the product via that method:

If they are not signed in, they will be asked to enter their address:

Creating a Schedule for Your Shipments or Deliveries
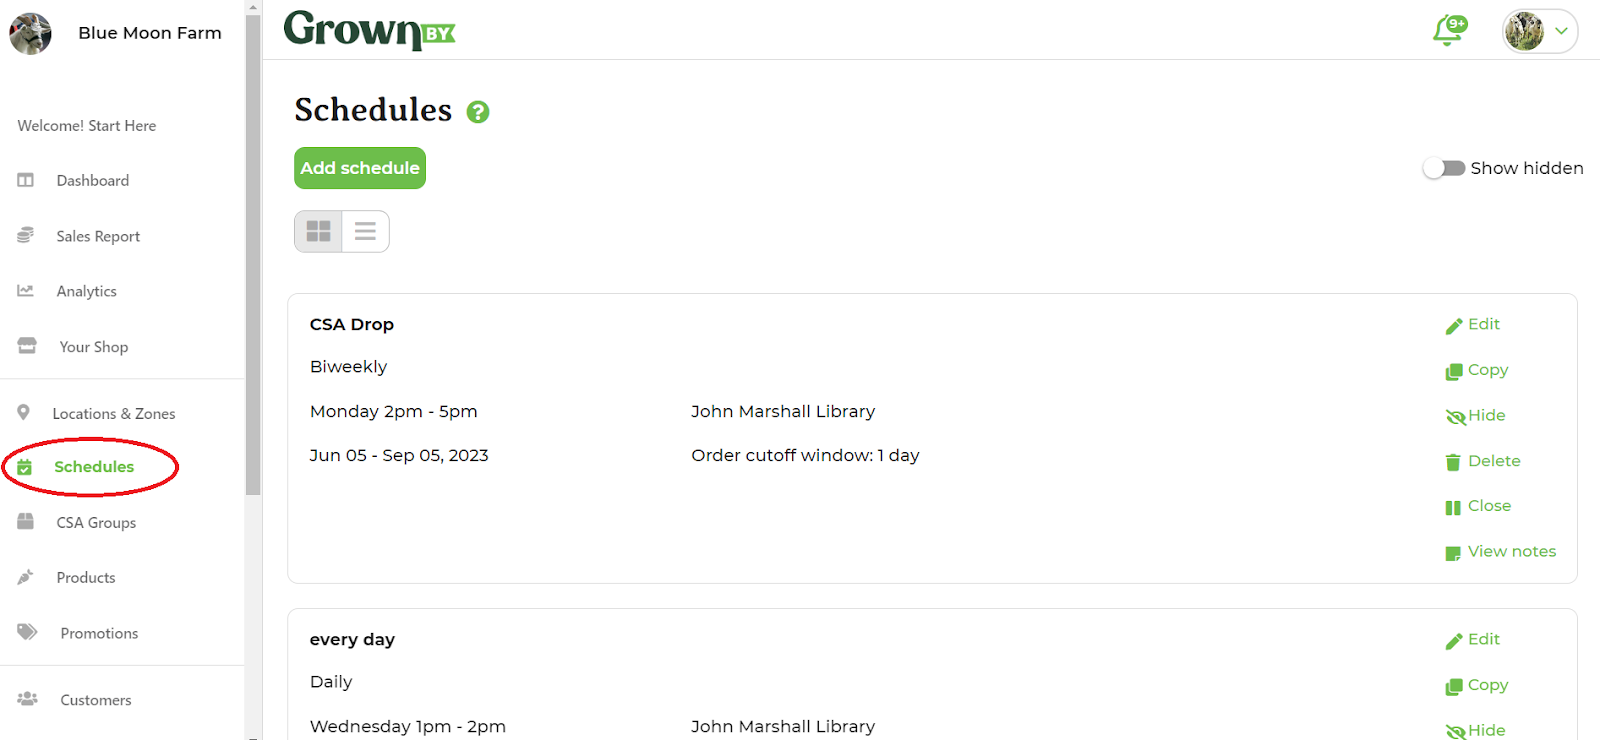
The next step is to Create a Schedule for your delivery. Click Schedules in your Dashboard Menu, then Add Schedule:
First, select the Zone from the drop down and then assign it a name. For example, this is an every Friday delivery you make in your “downtown” zone and you want to name it simply “Friday”. Optionally, you can add a Note. This is helpful if you want to let folks know when to expect their delivery or, if delivering to a non-home address, where to look for their delivery. The Order Cutoff Window field determines when you will stop accepting orders for this Schedule. If you enter "0", you can accept same-day orders up until the end time of the Schedule; "1" is midnight the day before the distribution; "2" is two days before the distribution. Finally, choose either Seasonal or Year-round and set the dates, times, and frequency for the Schedule.
There is also a checkbox where you can easily temporarily suspend the schedule to prevent customers from buying from it.
How Delivery and Shipping Fees Work
There are a few important things to know about how fees behave in GrownBy:
- They are invoiced separately from the Order itself.
- They are charged on the day the order is distributed; not on the day the order is placed (unless those are the same).
- Orders with the same delivery location and day are bundled together and only charged one fee.
- Customers receive email notifications of fees early morning on the day of the delivery.
- If the order is being paid for with farm credit, a credit card is required to complete the order. The credit card will be used as a backup payment method for the fee in the event that the shopper doesn't have enough farm credit to pay the fee at the time of distribution.
Exception Days
You can choose to skip or reschedule some of the days in the schedule within the system. You might want to do this if your regularly scheduled delivery falls on a holiday or if you want to establish a less regular or frequent schedule during some times of the year or month.
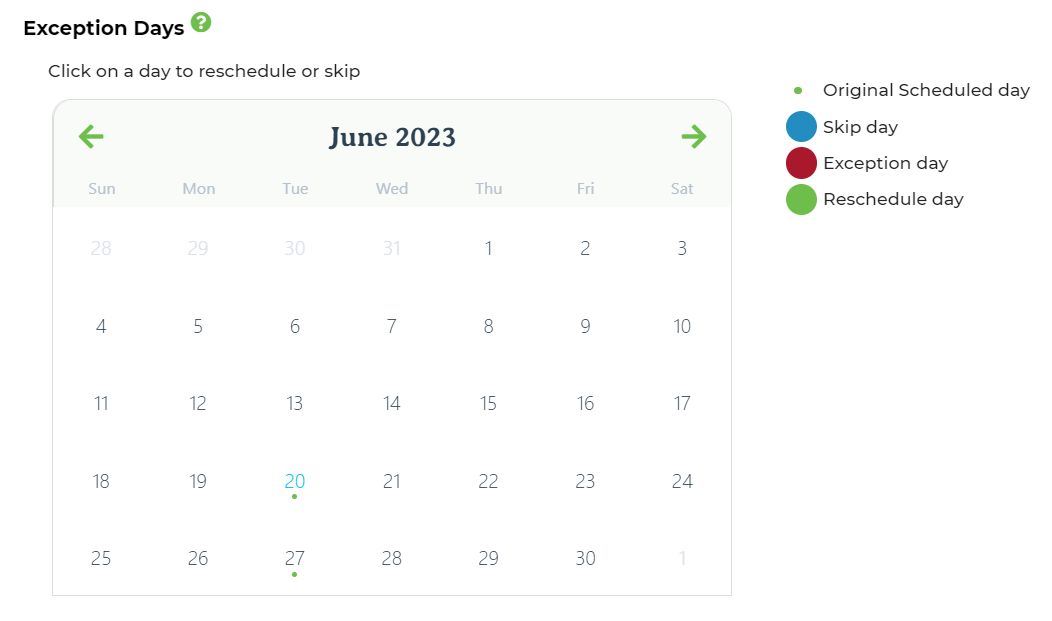
To Reschedule a date in the Schedule, click once on the date and then once on the date that you want ro reschedule it to. The original date turns red and the reschedule date green. To skip a day entirely, double click on that date in your schedule. It will turn blue. A summary of your reschedule and skip days will appear to the right of the calendar under the heading, List of Exceptions. To remove one, just click the X next to that item.
Making Your Products Available for Shipping/Delivery
Each product needs to be set up for shipping or delivery before it will be available to your Customers. Go to Products and, if in the thumbnail view, click Edit on the right hand side. If you’re in the list view, click the three horizontal dots and then choose Edit.
In the Product Detail page, scroll down to Schedules & Availability and select a Schedule from the drop down menu. After you choose the Schedule, each of the next selectors narrow the Availability to a subset of the Schedule. So, if you have a Weekly schedule, you can use the Frequency selector to make it biweekly or monthly and the Start and End dates to make it only available for part of the year. Click Submit.
Note: Each Product must be made available individually through the Products Menu in your Dashboard.
If you have any questions or concerns, please contact support@grownby.app or schedule a time to talk with us here!
Related Articles
Selling Wholesale on GrownBy
You can sell wholesale on GrownBy! Depending on your farm’s needs, there are a couple of different ways to set it up and this article will walk you through the options. We’ve broken it down with some questions that will help you decide how you want ...How to use GrownBy for different CSA types, including Custom
Community Supported Agriculture (CSA) share types have evolved significantly over the years and we see many innovations. Farmers use the phrase “CSA” and its framework to describe all kinds of selling strategies. With this chart, we aim to help you ...Selling Meat or Cheese on GrownBy
GrownBy works for selling Meat, Cheese, or other products that are pre-packaged and sold by weight. In this article, we cover a few different ways a Farmer might sell Meat or Cheese on GrownBy, and our suggestions for how to handle different ...Getting started on GrownBy
GrownBy is a direct marketing software (on desktop and mobile app) that is owned by farmers, like you. Using it, you can sell products via an online shop or sell shares and manage CSA customers. If you would like to start off by scheduling a call or ...Exporting Emails in GrownBy
Many farms will email customers with updates, share information, newsletters and more. There are many ways to pull emails from GrownBy, depending on your needs. Generate Email button: In Distributions > Sign In sheets, you can apply whatever filters ...